The Safe And Gentle Way To Tape Your Dog’s Ears
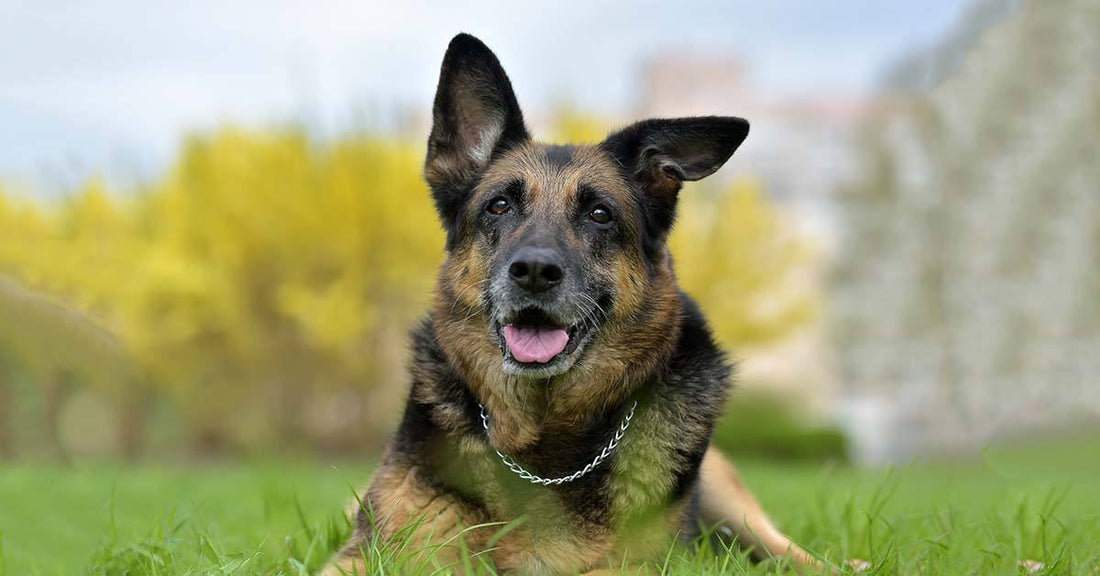
One of the most notable qualities of the regal German shepherd appearance is their large, erect ears. According to the American Kennel Club (AKC), the ears should be:
“Moderately pointed, in proportion to the skull, open toward the front, and carried erect when at attention, the ideal carriage being one in which the center lines of the ears, viewed from the front, are parallel to each other and perpendicular to the ground.”
While there are many wonderful dogs that don’t meet the breed standard, for some owners, their dog having erect ears is very important. For those that breed, compete, or show, according to the AKC it’s vital that their dogs meet the breed standard or they will be disqualified:
“A dog with cropped or hanging ears must be disqualified.”

German shepherd puppy ears go up between 8 weeks and 6 months. They will also often go up and down during this time, until they finish teething. It’s totally normal for the ears of dogs 3 to 4 months old to not yet be fully up.
However, if a puppy reaches around 5 months and their ears have never gone up, they will probably need some help. In this case, it’s a good idea to get a health check to ensure your dog is getting the right nutrition and doesn’t have parasites or any other health problems.
Once you’re satisfied that your puppy is in good health, the next thing you can do is tape the ears to help them stand. This video, Ear Taping by Dr. Bill, is a good example of how to gently and safely tape your dog’s ears:
Supplies you’ll need:
- Kendall Curity Porous Tape
- Square gauze, 4”x4”
- Large drinking straws
- Scissors
How to begin:
The video starts with Dr. Bill laying out all of is supplies and taping the straws to each individual piece of gauze. This keeps the straw in place while he rolls the gauze around the straw leaving a ½ strip of soft gauze padding at the end of each straw, this will ensure that the end of the straw will not injure the inside of the ear.

Next, he back-rolls the gauze so that the sticky tape is on the outside of the straw so that it will stick to the inside of the ear. He does this with both straws and as you can see in the video, it’s not very complicated to do. He explains that by using a straw, you’re also allowing air to get into the ear canal once they are taped so you’ll definitely want to use a large straw as opposed to something else that will prevent air circulation and lead to infection.
He then tears off the tape strips that will be used to tape the straw to the ears. He makes these in two sizes, two the width of the tape plus two narrower strips. He also tears off a strip to brace the ears. He sticks all these to the treatment table so that they are handy during the procedure.
How to tape the ears
After all his supplies are ready, Dr. Bill then begins taping the ears. On this puppy, the ears are a bit sensitive since they’ve been cropped but since cropping isn’t done on German shepherd dogs, it will be painless for your pup.
He inserts the soft end of the straw into the inside of the ear flap while holding the ear to the sticky tape on the straw. He then takes a piece of tape and starting on the back of the ear (the side with hair) tapes the ear to the straw so that the ear is standing in the erect position.

He then repeats the taping at the base of the ear, starting at the front of the ear, all the while calmly reassuring the puppy that he isn’t going to hurt him. He then uses more tape to cover the entire ear, so depending on the size of your pup’s ears, it may be easier to have extra strips at the ready.

Once the ear is completely taped, hold your fingers above the top of the ear (so that you don’t accidently cut the ear) and with the scissors, cut the access straw and tape off so that it’s not much longer than the ear.
After trimming, you’ll tape the second ear the same way you did the first. In the video, it’s easier to see the initial placement of the straw on the second ear so be sure you watch Dr. Bill tape both ears.
How to brace the ears
After both ears are taped and trimmed, you’ll then brace the ears with a narrow strip of tape. The video demonstrates how to wrap one thin piece of tape around the base of both ears using a crisscross method. This will help stabilize the ears if your dog shakes their head, etc. once the taping is complete.

The finished product
Once you’re done, the ears should be standing up in their future position. They should be braced so that they move in tandem when your dog moves or shakes their head. The tape should be light on the ears as opposed to heavy and not too uncomfortable for the dog.

How long should the tape stay on?
Leave the tape of the ears for two weeks. You’ll then remove and let the ears air out for a few days before re-taping. Your dog will wear the tape until their ears can stand up. If the ears are not standing on their own by 7 to 8 months, they most likely will never stand on their own so end the process and enjoy your beautiful pup just how they are.
We hope you find this video helpful. Ears up or down, we love German shepherds! Please feel free to share with your friends.
You may also like: How To Clean Your Dog’s Ears At Home

